

When it comes to comfort food, few dishes are as universally loved as mac and cheese. But what if you could take this classic dish and make it even more fun and bite-sized? Enter Tinis Mac and Cheese – a delightful twist on the traditional recipe that turns this cheesy favorite into mini, portable portions that are perfect for any occasion. Whether you’re hosting a party, serving up a quick weeknight dinner, or just craving something cheesy and satisfying, these tiny mac and cheese bites are the perfect solution.
In this step-by-step guide, we’ll show you how to create the ultimate Tinis Mac and Cheese, from selecting the best cheeses to getting that perfect creamy texture. Plus, we’ll share some fun variations and tips to elevate your dish to the next level. Ready to make the best bite-sized mac and cheese ever? Let’s dive in!
What Makes Tinis Mac and Cheese Special?
Unique Cheese Blend: The Secret to the Perfect Tinis Mac and Cheese
One of the key reasons Tinis Mac and Cheese stands out is the special blend of cheeses that creates its signature creamy, rich flavor. In this recipe, you’ll use a combination of cheddar, mozzarella, and Parmesan—each bringing something unique to the table. Let’s take a closer look at what makes each cheese essential for the perfect mac and cheese.
Cheddar Cheese: The Heart of Your Dish
Cheddar is the backbone of any mac and cheese recipe, and for good reason. Its sharp, tangy flavor gives your dish depth and complexity. Whether you choose mild, medium, or sharp cheddar, it will melt beautifully, creating a smooth and luscious base for your cheese sauce. This cheese is what brings that signature “mac and cheese” flavor that everyone loves, so don’t skip it!
Mozzarella: Creaminess at Its Best
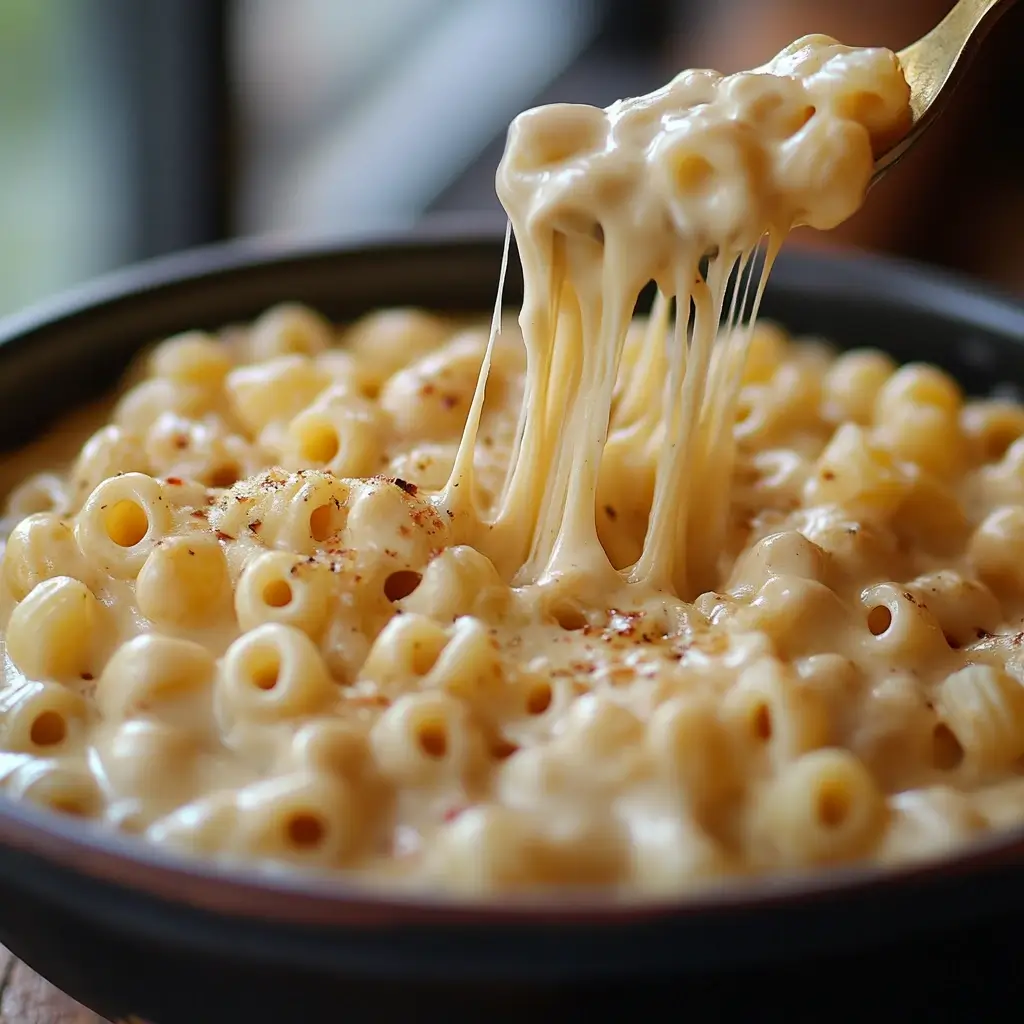
While cheddar adds sharpness, mozzarella is the cheese that enhances the creaminess of your mac and cheese. This cheese melts incredibly well, creating a silky smooth texture that coats the pasta perfectly. Mozzarella helps bind everything together, giving the dish that irresistible gooeyness that’s impossible to resist. It’s the key to achieving the perfect, stretchy cheese pull you want when you dig into your bowl.
Parmesan: A Touch of Umami
To add an extra layer of flavor, Parmesan cheese is the secret ingredient that elevates your dish. This hard, nutty cheese has a slightly salty and savory taste that enhances the overall depth of flavor in your mac and cheese. When combined with cheddar and mozzarella, Parmesan adds a touch of umami, making every bite more complex and satisfying. A sprinkle on top before serving also gives your dish a beautiful golden finish.
Why This Blend Works
Using these three cheeses in combination ensures that you get the best of both worlds: the bold, sharp flavor of cheddar, the gooey richness of mozzarella, and the salty depth of Parmesan. The result is a well-balanced, flavorful mac and cheese that’s creamy without being overly heavy. Each bite provides a different experience, but they all come together to create the perfect comfort food.
Now that you understand the magic behind this unique cheese blend, it’s time to get cooking! Trust me, once you try this combination, you’ll never go back to a single-cheese mac and cheese again. Ready to take your dish to the next level? Let’s move on to the next step in your mac and cheese journey!
Mozzarella and Parmesan: The Dynamic Duo for a Creamy, Flavorful Mac and Cheese
When it comes to creating the perfect mac and cheese, you’ll want to focus on more than just cheddar. Mozzarella and Parmesan are essential to achieving that irresistible creamy texture and well-rounded flavor. Let’s dive into how these two cheeses work together to elevate your dish.
Mozzarella: The Key to Creaminess
Mozzarella cheese is what makes your mac and cheese truly indulgent. Known for its smooth, stretchy texture, it melts beautifully and blends seamlessly into the sauce, making it rich and velvety. The high moisture content of mozzarella ensures that your cheese sauce is smooth, without any graininess or lumps. This is especially important when you’re looking for that perfect cheese pull when you scoop up a forkful of your mac and cheese.
- Melts beautifully: Mozzarella melts like a dream, making it the perfect choice to add smoothness and creaminess to your dish.
- Gooey and stretchy: When melted, mozzarella creates that iconic gooey texture you want in mac and cheese. It gives your dish that delightful stretch when you pull your fork out of the bowl.
- Mild, creamy flavor: While mozzarella may not have the strong flavor of cheddar, it adds a subtle creaminess that softens the sharpness of other cheeses, creating a balanced and smooth sauce.
Parmesan: Adding Depth and Complexity
Parmesan cheese is your secret weapon for a more flavorful mac and cheese. Unlike mozzarella, Parmesan is a hard, aged cheese with a rich, savory taste that can take your dish from ordinary to extraordinary. It brings an umami flavor that enhances the taste of the entire dish, balancing out the creaminess of the mozzarella and the sharpness of the cheddar.
- Aged and nutty: Parmesan has a distinct, nutty flavor that becomes more intense the longer it ages. This adds an extra depth to your mac and cheese, enriching the overall flavor profile.
- Savory and salty: A little goes a long way when it comes to Parmesan. Its savory, salty notes help bring out the natural flavors of the other cheeses, ensuring your dish is perfectly seasoned without being overpowering.
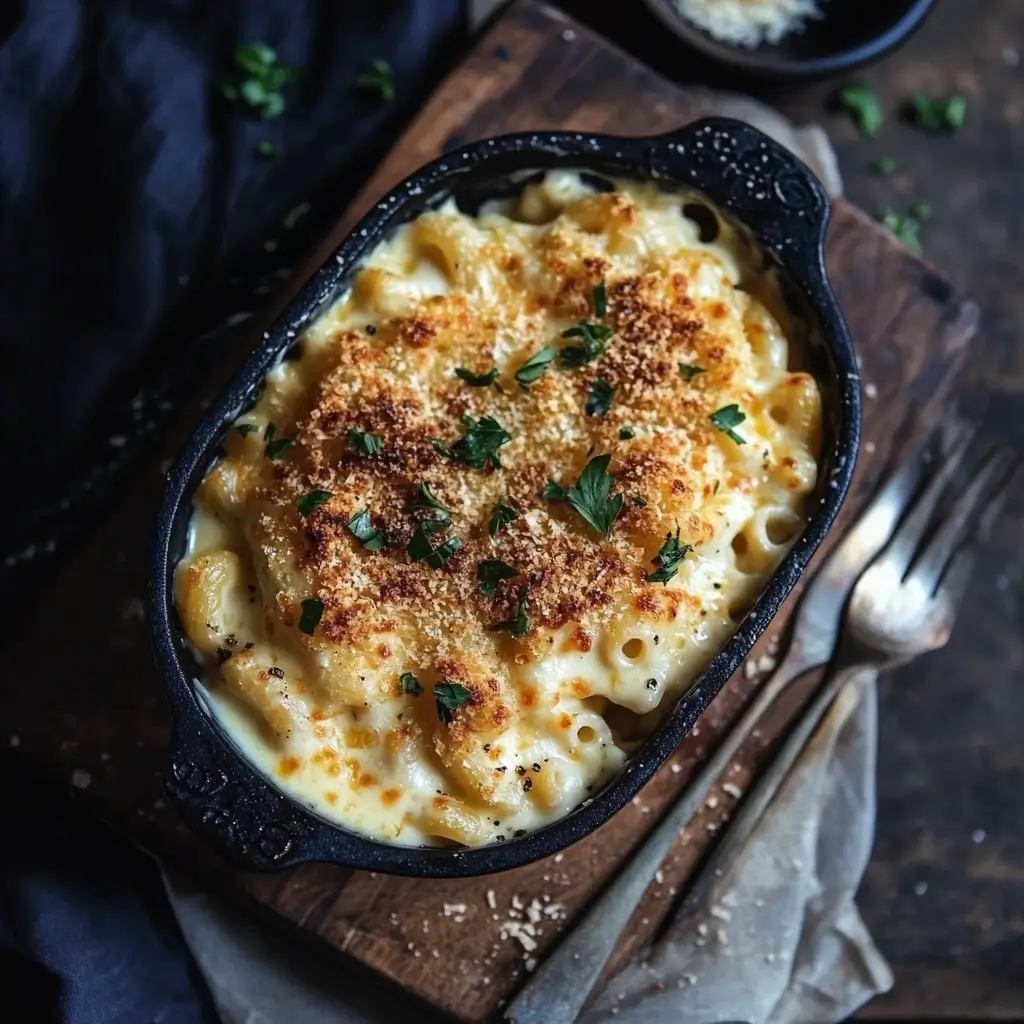
- Golden, crispy top: When sprinkled over the top of your mac and cheese before baking, Parmesan creates a beautiful golden crust that adds texture and flavor, making your dish even more tempting.
Why Mozzarella and Parmesan Are Perfect Together
When combined, mozzarella and Parmesan form a beautiful harmony of textures and flavors. Mozzarella contributes the creamy, melt-in-your-mouth quality that makes mac and cheese so comforting, while Parmesan adds that extra punch of flavor that keeps you coming back for more. Together, they create a cheese sauce that’s both rich and balanced—creamy, yet savory—giving your mac and cheese the perfect bite every time.
Now that you know how mozzarella and Parmesan come together to make your mac and cheese truly exceptional, it’s time to grab your ingredients and start cooking. With this dynamic duo, you’ll have a cheesy masterpiece that will leave everyone at the table asking for seconds. Ready to move on to the next step? Let’s continue with making the perfect cheese sauce!
Perfect for Every Meal: Why Tinis Mac and Cheese is the Ultimate Comfort Food
Tinis Mac and Cheese is more than just a dish—it’s a meal that can fit any occasion. Whether you’re preparing it for a cozy dinner at home, a family gathering, or even a party, this recipe is sure to please everyone. Let’s explore why Tinis Mac and Cheese is the perfect choice for every meal.
A Quick and Easy Dinner
After a long day, you want a meal that’s both satisfying and simple to prepare. Tinis Mac and Cheese is exactly that! With minimal ingredients and easy-to-follow steps, this recipe ensures you can have a hearty meal on the table in no time. It’s the perfect solution for those busy evenings when you need something that tastes great without spending hours in the kitchen.
- Fast to prepare: With just a few basic ingredients and a quick cooking process, you’ll have your mac and cheese ready in under an hour.
- Minimal effort, maximum flavor: Despite its simplicity, this dish delivers a rich, flavorful experience, making it a go-to for quick dinners.
Perfect for Family Meals
If you’re feeding a crowd, Tinis Mac and Cheese is the ultimate crowd-pleaser. It’s easy to double or triple the recipe to feed a larger group, and everyone—whether young or old—will love the creamy, cheesy goodness. Plus, you can customize it to suit various tastes. Want to add bacon or extra veggies? Go ahead! This dish is incredibly versatile and can be tailored to fit your family’s preferences.
- Feeds a crowd: Whether you’re feeding your immediate family or hosting a larger gathering, this recipe can easily be scaled up.
- Customizable: Add-ins like bacon, sautéed onions, or even a sprinkle of breadcrumbs give you the flexibility to make it your own.
A Comfort Food for Any Occasion
Tinis Mac and Cheese isn’t just for casual dinners; it’s also the perfect dish for special occasions. Whether you’re hosting a holiday meal, a birthday dinner, or a potluck, this mac and cheese will never disappoint. Its creamy texture and rich flavor make it a hit at any event, and it’s guaranteed to bring smiles to the table. Plus, it pairs wonderfully with many main dishes like roasted chicken, grilled steak, or even a fresh salad.
- Great for special occasions: Whether it’s a holiday or a celebration, Tinis Mac and Cheese brings comfort and joy to any gathering.
- Pairs with many dishes: Serve it alongside your favorite meats or veggies for a complete, satisfying meal.
Leftovers Make Great Lunches
If you happen to have any leftovers, you’re in for a treat. Tinis Mac and Cheese tastes just as amazing the next day. The flavors continue to develop, and the texture of the cheese sauce stays creamy and smooth. Pack it up for lunch or enjoy it as a snack, and you’ll be satisfied all over again.
- Perfect for leftovers: The dish reheats wonderfully, maintaining its creamy texture and rich flavor.
- Great for lunch: Tinis Mac and Cheese is easy to store and makes a filling, delicious lunch option the next day.
No matter what meal you’re planning—whether it’s a busy weekday dinner, a big family get-together, or a special celebration—Tinis Mac and Cheese is the perfect dish to have on hand. It’s quick, customizable, and always a hit. So, why not make it tonight? Once you try this easy, cheesy recipe, it will quickly become a staple in your meal rotation!
Essential Ingredients for Tinis Mac and Cheese
Cheddar Cheese: Why It’s the Star Ingredient in Mac and Cheese
When it comes to mac and cheese, the most essential ingredient is undoubtedly cheddar cheese. This is the cheese that gives your dish that signature tangy, bold flavor that everyone loves. But cheddar does much more than just taste great—it plays a crucial role in creating that creamy, velvety texture that makes mac and cheese so irresistible. Let’s break down why cheddar cheese is truly the star of your mac and cheese recipe.
Cheddar Adds the Signature Flavor
Cheddar cheese is known for its sharp, tangy flavor that really stands out in a dish like mac and cheese. Whether you use mild, medium, or sharp cheddar, this cheese brings a depth of flavor that other cheeses can’t quite match. The richness of cheddar enhances the overall taste of the dish, making every bite more satisfying. Without cheddar, mac and cheese would lack that bold, cheesy kick that we all crave.
- Sharp, tangy taste: Cheddar gives your mac and cheese its distinct flavor profile.
- Balance: It adds a perfect contrast to the creamy mozzarella and the savory Parmesan in the dish.
Melts Perfectly for a Creamy Texture
One of the reasons cheddar cheese is so perfect for mac and cheese is how easily it melts. When cheddar is heated, it melts into a smooth, gooey consistency, which helps create the creamy cheese sauce you want. This melting ability is what makes the cheese sauce so indulgent and comforting. When paired with the mozzarella and Parmesan, cheddar ensures that the sauce coats your pasta beautifully without being too runny or too thick.
- Smooth melt: Cheddar blends seamlessly into the sauce for a rich, creamy texture.
- Perfect consistency: It helps create that thick, velvety cheese sauce that coats each piece of pasta.
Versatile for Any Type of Mac and Cheese
Cheddar is also incredibly versatile, making it the perfect base for any variation of mac and cheese. Whether you want to make a classic baked mac and cheese or a stovetop version, cheddar can adapt to different cooking methods and still deliver that great flavor. It also works well with other cheeses, enhancing the overall flavor profile while maintaining its role as the dominant taste.
- Works in any recipe: Whether you bake it or cook it on the stovetop, cheddar will melt beautifully and create a creamy base.
- Mixes well: It pairs wonderfully with other cheeses like mozzarella and Parmesan, allowing you to experiment with different flavors while keeping cheddar as the star.
Why Cheddar Should Never Be Skipped
Without cheddar cheese, your mac and cheese wouldn’t be the same. Its distinct flavor and melting qualities are what make the dish so comforting and delicious. While mozzarella and Parmesan play important roles in the dish, cheddar is the backbone—the one that gives your mac and cheese that crave-worthy taste and texture.
Now that you know why cheddar is the heart and soul of mac and cheese, it’s time to pick out your favorite cheddar and start cooking! Trust me, once you see how perfectly it melts and how great it tastes, you’ll always make sure to include cheddar in your mac and cheese recipe. Ready to move on to the next steps? Let’s keep building that perfect cheese sauce!
Mozzarella and Parmesan: Enhancing Your Mac and Cheese
While cheddar cheese is undoubtedly the star of mac and cheese, mozzarella and Parmesan are the dynamic duo that take your dish to the next level. These two cheeses, each with its own unique characteristics, work together to create the perfect balance of flavor, texture, and richness. Let’s take a closer look at how mozzarella and Parmesan contribute to making your mac and cheese unforgettable.
Mozzarella: The Creamy Texture You Crave
Mozzarella is essential for giving your mac and cheese that luscious, creamy texture that everyone loves. Unlike cheddar, which has a sharper taste, mozzarella is mild and smooth, which allows it to melt beautifully. When you add mozzarella to your cheese sauce, it gives the dish that indulgent, gooey consistency that makes each bite feel like a warm hug.
- Smooth and creamy: Mozzarella helps create a silky cheese sauce that coats the pasta perfectly, without being too heavy.
- Great melting properties: When melted, mozzarella stretches and blends seamlessly into the sauce, adding that perfect cheese pull you crave.
- Mild flavor: While mozzarella may not be as bold as cheddar, its mild, creamy taste complements the other cheeses, providing a well-rounded flavor profile.
Parmesan: Adding Depth and Flavor
Parmesan is the key to adding richness and complexity to your mac and cheese. This hard, aged cheese has a nutty, salty flavor that deepens the overall taste of your dish. A little goes a long way, as Parmesan’s strong flavor enhances the other cheeses without overpowering them. When added to your cheese sauce, Parmesan brings a savory note that balances the richness of mozzarella and cheddar.
- Nutty and salty: Parmesan’s intense flavor adds depth to your cheese sauce, elevating the dish to a whole new level.
- A little goes a long way: Since Parmesan is strong in flavor, just a sprinkle is enough to make a noticeable impact.
- Golden, crispy top: When you sprinkle Parmesan on top before baking, it forms a beautiful, golden crust that adds both texture and flavor to your mac and cheese.
Why Mozzarella and Parmesan Are Perfect Together
When combined, mozzarella and Parmesan offer the best of both worlds: mozzarella gives you that creamy, gooey texture, while Parmesan adds depth and complexity to the flavor. The two cheeses complement each other perfectly, enhancing the richness of the cheddar and creating a balanced, flavorful sauce that coats your pasta in all the right ways.
- Balanced flavor: Mozzarella provides the creaminess, while Parmesan adds a savory kick, making your mac and cheese both rich and flavorful.
- Ideal texture: The two cheeses melt beautifully, creating a sauce that’s smooth, creamy, and perfectly clings to each piece of pasta.
Now that you understand the essential roles mozzarella and Parmesan play in making your mac and cheese extra special, it’s time to start cooking. With these cheeses working together, your mac and cheese will have the perfect balance of creamy texture and bold flavor. Ready to get started? Let’s move on to the next step and make that delicious cheese sauce!
Butter, Flour, and Milk: The Foundation of a Creamy Cheese Sauce
When it comes to making the perfect mac and cheese, the sauce is key. The creamy cheese sauce you love wouldn’t be possible without the combination of butter, flour, and milk. These three ingredients are essential for creating the smooth, velvety texture that makes mac and cheese so indulgent. Let’s break down how each one contributes to the sauce and why they’re so important.
Butter: The Rich Base
Butter is the first ingredient you’ll use when making your cheese sauce, and it serves as the foundation for everything. It adds richness and flavor to the sauce, making it taste creamy and indulgent. The butter also helps to melt the cheeses smoothly, creating a luscious consistency.
- Adds richness: Butter makes your cheese sauce taste rich and creamy, which is essential for mac and cheese.
- Helps the cheese melt: Butter’s fat content allows the cheese to melt evenly, making the sauce smooth without any lumps.
Flour: Thickening the Sauce
Flour is the ingredient that helps thicken your cheese sauce and gives it that velvety consistency. When you cook the butter and flour together, you form a roux—a simple mixture that thickens the sauce without making it too heavy. The flour ensures that your cheese sauce has the right texture to coat the pasta without being runny.
- Creates a smooth texture: Flour thickens the sauce and gives it the creamy, smooth consistency that makes mac and cheese so satisfying.
- Prevents clumps: Cooking the flour with butter helps prevent any clumps from forming, ensuring the sauce is lump-free and silky.
Milk: The Liquid for Creaminess
Milk is what brings everything together and gives the cheese sauce its smooth, pourable consistency. It helps balance out the richness of the butter and cheese, ensuring the sauce isn’t too thick or greasy. The milk also helps to dissolve the flour and blend the cheeses, creating a perfectly creamy texture.
- Balances richness: Milk helps keep the sauce from being too thick or greasy, providing just the right amount of creaminess.
- Helps dissolve the cheese: Milk ensures that the cheese melts easily, creating a smooth, creamy sauce that coats the pasta beautifully.
When you combine butter, flour, and milk, you create the perfect base for your cheese sauce. These simple ingredients come together to form a smooth, creamy consistency that perfectly complements the cheddar, mozzarella, and Parmesan. The result is a cheese sauce that coats the pasta in all the right ways, creating that classic mac and cheese texture you can’t resist.
Now that you know how important these ingredients are for making a perfect cheese sauce, it’s time to get started! Grab your butter, flour, and milk, and let’s make that creamy, cheesy sauce that will take your mac and cheese to the next level! Ready to cook? Let’s move on to the next step!
Macaroni: The Heart of Your Tinis Mac and Cheese
When you think of mac and cheese, the first thing that comes to mind is probably the macaroni—the small, curved pasta that holds all that cheesy goodness. Choosing the right type of pasta is essential to making a perfect Tinis Mac and Cheese, and here’s why:
Why Macaroni Works Best
Macaroni isn’t just the classic choice for mac and cheese—it’s the best choice! The small, hollow shape allows the cheese sauce to cling to the pasta perfectly, ensuring every bite is packed with flavor. It’s not too large or too small, which makes it ideal for these mini, bite-sized portions.
What Type of Macaroni to Use
There are many pasta shapes out there, but when it comes to making Tinis Mac and Cheese, you’ll want to stick with traditional elbow macaroni. Here’s why:
- Size matters: Elbow macaroni is small enough to work well in mini muffin tins, ensuring each bite is perfectly portioned.
- Shape advantage: The curves of elbow macaroni allow the cheese sauce to fill the pasta, giving you a creamy, cheesy bite every time.
You may be tempted to experiment with other shapes like penne or shells, but remember that macaroni’s size and shape are what give Tinis Mac and Cheese its signature texture and flavor balance.
Cooking the Macaroni
Cooking your macaroni properly is a crucial step in getting the right texture for your Tinis Mac and Cheese. Here are a few tips to make sure it’s just right:
- Don’t overcook: You want your macaroni to be al dente—firm to the bite. Since the pasta will bake again in the oven, you don’t want it to get mushy. Follow the cooking instructions on the package, but aim to cook it for a minute or two less than recommended.
- Use plenty of water: When boiling pasta, use a large pot with plenty of water so the macaroni has space to cook evenly.
- Salt the water: Adding a pinch of salt to the boiling water helps enhance the flavor of the pasta. It’s a simple step that makes a big difference in taste.
Can You Use Other Pasta Shapes?
While elbow macaroni is your go-to, you can absolutely get creative with different shapes if you like! Small pasta shapes like cavatappi (twisted tubes) or rotini (spirals) can work well too, adding variety and a fun look to your mini mac and cheese. However, these shapes might not hold the cheese sauce quite as well as macaroni, so keep that in mind if you decide to experiment.
Ready to Get Cooking?
Now that you know the importance of choosing the right pasta, it’s time to get cooking! Remember, macaroni is the perfect choice for your Tinis Mac and Cheese because of its size, shape, and ability to hold all that creamy cheese sauce. Next, we’ll move on to the next step—making that rich, velvety cheese sauce you’re craving!
Step-by-Step Guide to Making Tinis Mac and Cheese
Step 1: Boil the Pasta
Boiling the pasta may seem like the easiest part of making Tinis Mac and Cheese, but getting it just right is crucial for the perfect dish. You want your macaroni to be cooked to the ideal texture: soft enough to absorb that creamy cheese sauce, but firm enough to hold up when baked. Here’s how you can do it!
How Much Water Do You Need?
Start by filling a large pot with plenty of water. The general rule of thumb is about 4 to 6 quarts of water for every pound of pasta. The more water you use, the less likely your pasta will stick together. Pasta needs room to move around and cook evenly.
Don’t Forget the Salt!
Adding salt to your boiling water isn’t just for flavor—it’s essential. Aim for about 1 to 2 tablespoons of salt per gallon of water. This step will season the pasta itself and add extra flavor to your Tinis Mac and Cheese.
Bring the Water to a Rolling Boil
Once your pot is filled with water and salted, bring it to a boil over high heat. You’ll know it’s ready when you see bubbles consistently breaking on the surface. This might take 5-10 minutes, so be patient.
Add the Pasta
Now it’s time to add your macaroni to the boiling water. Stir it gently right after adding it to avoid clumping. Keep an eye on the pasta as it cooks and stir occasionally to prevent any pieces from sticking together.
Cooking Time Matters
The key to getting your pasta just right is watching the clock. Follow the package instructions, but aim to cook the pasta 1 to 2 minutes less than the recommended time. You want your macaroni to be al dente, which means it should have a slight firmness when you bite into it.
Test for Doneness
The best way to check is by tasting a piece of macaroni. If it’s firm but not hard, it’s ready. If it’s mushy, you’ve overcooked it, so don’t let that happen! Remember, your pasta will continue to cook later when it bakes in the oven, so it’s better to undercook it slightly now.
Drain and Rinse?
Once your pasta is done, drain it in a colander. Unlike some other recipes where you rinse pasta to remove starch, don’t rinse your macaroni here! You want to keep the starch on the pasta so that the cheese sauce sticks better.
Why Does Cooking the Pasta Properly Matter?
Cooking your macaroni properly makes a big difference in the final texture of your Tinis Mac and Cheese. If the pasta is too soft or overcooked, it will turn mushy once combined with the sauce and baked. Under-cooked pasta, on the other hand, will be too chewy and hard to bite into. The right balance is key to achieving that perfect, creamy, cheesy bite.
Next Step: Time to Make the Cheese Sauce!
Now that your macaroni is perfectly cooked, you’re ready to move on to the next exciting step—making the rich and creamy cheese sauce that will take your Tinis Mac and Cheese to the next level! But first, take a moment to check your pasta—make sure it’s ready to be paired with that cheesy goodness. Once it’s done, let’s get saucy!
Step 2: Make the Cheese Sauce
Now that your pasta is ready, it’s time to prepare the heart of your Tinis Mac and Cheese—the creamy, cheesy sauce. The cheese sauce is what brings all the flavors together, so getting it right is crucial. Don’t worry! I’ll walk you through it step by step, and it’s simpler than you might think.
Gather Your Ingredients
Before you get started, make sure you have everything you need within arm’s reach. Here’s what you’ll need to make a smooth, creamy cheese sauce:
- Butter (about 2 tablespoons)
- All-purpose flour (about 2 tablespoons)
- Milk (whole milk is best, about 1 ½ cups)
- Cheese (around 2 cups, shredded—cheddar is the most common, but feel free to mix it up with mozzarella or gouda for a creamy finish)
- Salt and pepper to taste
Make the Roux (The Base of the Sauce)
The first step in making your cheese sauce is creating what’s called a roux. A roux is a simple mixture of butter and flour that thickens the sauce. Here’s how you do it:
- Melt the butter: Start by melting the butter in a medium-sized saucepan over medium heat. Let it melt slowly, but don’t let it brown.
- Add the flour: Once the butter is melted, sprinkle the flour into the pan. Stir it constantly with a whisk or wooden spoon for about 1 to 2 minutes. The goal here is to cook the flour just enough so it doesn’t taste raw, but not so much that it turns brown.
- Look for a paste-like consistency: The butter and flour should form a thick paste—this is your roux. You’ll know it’s ready when it’s smooth and slightly bubbly, but not too dark in color.
Slowly Add the Milk
Now it’s time to turn your roux into a creamy sauce. You’ll want to add the milk gradually to avoid lumps:
- Add a small amount of milk at first: Slowly pour in a little milk at a time, stirring constantly. This helps prevent clumps from forming and ensures the sauce stays smooth.
- Continue to add milk: Keep stirring and adding the rest of the milk, a little at a time, until the mixture is fully combined and thickened. This should take about 3 to 4 minutes.
- Check the consistency: Your sauce should be thick enough to coat the back of a spoon. If it seems too thick, add a little more milk to reach the desired consistency.
Add the Cheese
Here comes the fun part! The cheese is what makes this sauce rich and delicious.
- Turn off the heat: Once the milk mixture is smooth and thick, take the pan off the heat to avoid overheating the cheese.
- Stir in the shredded cheese: Slowly add your shredded cheese to the sauce, stirring constantly until the cheese is fully melted and the sauce is creamy. If you’re using multiple types of cheese (like cheddar and mozzarella), you can mix them together for extra flavor and creaminess.
- Season to taste: Add a pinch of salt and pepper to the sauce. Taste it to see if it needs a little extra seasoning. If you like it spicy, you can also add a dash of paprika or mustard powder for a kick.
Why the Cheese Sauce Matters
The cheese sauce is the key to a smooth, creamy Tinis Mac and Cheese. The butter and flour create a base that thickens the sauce without making it too heavy. The cheddar cheese (or whatever cheese you choose) brings the richness and flavor that makes this dish so irresistible.
Remember, the trick is to keep the heat low while you make the sauce. This helps to avoid burning the butter and ensures the sauce doesn’t get lumpy. Taking your time and adding the milk slowly will guarantee that perfect texture every time.
Time to Combine!
Now that your cheese sauce is perfectly creamy and cheesy, it’s time to combine it with your pasta. The sauce will coat each piece of macaroni, creating that deliciously gooey texture that everyone loves. But before you do that, take a moment to admire your hard work! You’re almost there.
Step 3: Assemble the Tinis Mac and Cheese
Now that you’ve boiled the pasta and made the creamy cheese sauce, it’s time to bring everything together. Assembling your Tinis Mac and Cheese is easy, and it’s where the magic really happens. Follow these steps to make sure your mini mac and cheese bites turn out perfectly every time.
What You’ll Need
Before you start, make sure you have everything ready to go:
- Your cooked macaroni (drained and slightly cooled)
- The creamy cheese sauce you just made
- A mini muffin tin or small baking dish (for mini mac and cheese bites)
- Optional: Breadcrumbs for topping (for a crispy finish)
Step 1: Prepare Your Baking Dish
If you’re using a mini muffin tin, lightly grease the cups with butter or cooking spray. This will make it easier to remove the mac and cheese once it’s baked. If you prefer to use a small baking dish, just lightly grease it with butter as well. This helps prevent sticking and ensures your Tinis Mac and Cheese comes out beautifully.
Step 2: Combine the Pasta and Cheese Sauce
Now, take your cooked macaroni and pour it into the bowl with the cheese sauce. Stir them together gently, making sure every piece of pasta is coated with the creamy sauce. This is where the creamy cheese sauce will work its magic—each macaroni piece should be covered, so every bite will be rich and cheesy.
Step 3: Fill the Muffin Tin or Dish
Once the pasta and sauce are combined, it’s time to portion it out. If you’re using a mini muffin tin, spoon the pasta mixture into each muffin cup, filling them up almost to the top. You want each mini mac and cheese bite to have a good amount of sauce and pasta, but not overflow. If you’re using a small baking dish, simply spread the mixture evenly across the bottom.
Step 4: Add Optional Toppings (Breadcrumbs)
For a crispy, golden top, sprinkle breadcrumbs over the pasta mixture before baking. You can use plain or seasoned breadcrumbs, depending on the flavor you’re going for. A light dusting of breadcrumbs will give your Tinis Mac and Cheese a satisfying crunch that contrasts beautifully with the creamy inside.
If you’re feeling extra adventurous, you could even mix some shredded cheese into the breadcrumbs for an extra cheesy topping. This will help the top get even crispier and cheesier.
Step 5: Bake
Now that your mini mac and cheese bites are assembled, it’s time to bake them to perfection. Place your muffin tin or baking dish in a preheated oven at 350°F (175°C). Bake for about 15–20 minutes or until the tops are golden brown and crispy.
If you’re using a small baking dish, you can bake the mac and cheese for a little longer (about 25–30 minutes) to make sure everything is nice and bubbly.
Why This Step Is Important
Assembling your Tinis Mac and Cheese properly ensures each bite has the perfect balance of creamy sauce and pasta. The optional breadcrumbs add a nice contrast in texture, giving you a crunchy exterior with a warm, cheesy interior. It also makes your mini mac and cheese more fun and easier to serve as appetizers or party snacks.
By baking in a muffin tin or a small dish, you give the cheese sauce a chance to set and meld with the pasta, creating those irresistible, bite-sized mac and cheese portions that everyone loves.
Ready to Serve?
Once they’re baked and golden, you can let your Tinis Mac and Cheese cool for a few minutes before serving. Whether you’re serving them at a party, enjoying them as a snack, or adding them to your weeknight dinner, they’re sure to be a hit.
Step 4: Bake or Serve Immediately
Now that your Tinis Mac and Cheese is all assembled, you have two options: you can either bake them for that crispy, golden finish, or serve them right away if you’re in a hurry. Both ways are delicious—let’s break down the best approach for each option so you can decide what works best for your situation.
Option 1: Bake for the Perfect Crunch
Baking your mini mac and cheese bites brings them to life, giving them a golden, crispy top while the inside stays warm and cheesy. It’s the classic way to serve them, and here’s how to do it:
- Preheat the Oven: Set your oven to 350°F (175°C) and let it heat up while you get everything ready. This is the ideal temperature for baking your Tinis Mac and Cheese.
- Bake the Bites: Place your muffin tin or baking dish in the oven and bake for 15-20 minutes. You’ll want the top to be golden and a bit crispy, which means they’re ready. If you’re using a small baking dish, it may take about 25–30 minutes.
- Check for Doneness: The edges should be slightly browned, and the cheese should be bubbling. If you like them extra crispy, feel free to leave them in the oven for a couple more minutes. Just make sure to keep an eye on them!
- Let Them Cool: After baking, let your mini mac and cheese bites sit for about 5 minutes to cool down slightly. This will help them firm up, making them easier to remove from the pan.
Baking adds that perfect texture contrast: crispy on top, creamy inside. It’s great for serving a crowd or preparing in advance for parties.
Option 2: Serve Immediately (No Baking Required)
If you don’t have time to bake, or if you’re craving something fast and cheesy, you can serve your Tinis Mac and Cheese right away after mixing the pasta and sauce together. Here’s how:
- Serve Directly: If you’re in a hurry, spoon the cheese-coated pasta directly onto plates or small bowls. You can even scoop it into mini muffin tins without baking if you like.
- Add Toppings (Optional): If you’d like a bit of extra crunch, you can sprinkle some breadcrumbs on top and then pop the bites under the broiler for a minute or two. This will give you that golden, crispy finish without baking the entire dish.
This option is perfect when you want a quick, comforting meal without waiting for the oven. It’s also great for weeknight dinners or when you’re in a rush but still want to enjoy the creamy goodness of mac and cheese.
Why You Might Choose One Over the Other
- Baking: If you have the time and want those crispy, golden tops that everyone loves, baking is the way to go. It also makes the mac and cheese bites easier to serve in portions—perfect for parties or gatherings.
- Serving Immediately: If you’re short on time or just want to enjoy the dish as soon as it’s ready, serving immediately is a great choice. While you won’t get the crispy top, the mac and cheese will still be creamy and delicious.
Both options give you that rich, cheesy flavor you love, so the choice is really up to your schedule and how you like your mac and cheese.
Enjoy Your Tinis Mac and Cheese!
Once your Tinis Mac and Cheese is baked or served, you’re ready to enjoy these bite-sized treats! Whether you’re serving them at a party, as an appetizer, or as a quick snack, they’re sure to be a hit. Don’t forget to pair them with a side salad or some veggies to round out your meal.
Tips for Serving and Storing Your Tinis Mac and Cheese
Serving Suggestions
Once your Tinis Mac and Cheese is ready, it’s time to serve! These bite-sized treats are versatile and can be paired with a variety of sides or enjoyed on their own. Here are a few ideas to make your meal even better:
Pair with a Fresh Salad
A light, fresh salad is the perfect balance to the creamy, cheesy goodness of your mini mac and cheese. Consider a simple green salad with mixed greens, cherry tomatoes, and a light vinaigrette. The freshness will complement the richness of the mac and cheese.
Serve as Appetizers
If you’re hosting a party or family gathering, these Tinis Mac and Cheese bites make for great appetizers. Serve them with dipping sauces like ketchup, ranch dressing, or even hot sauce for extra flavor.
Add Some Protein
Want to make it a complete meal? Pair your mac and cheese with a protein, like grilled chicken, bacon bits, or even sausage. These add-ins will give your dish more substance and flavor.
Perfect for Meal Prep
Tinis Mac and Cheese also work well for meal prepping! They can be made in advance, stored in the fridge, and reheated when needed. Perfect for quick lunches or snacks throughout the week.
Ready to Serve?
Now that you have some great serving ideas, it’s time to enjoy your Tinis Mac and Cheese. Whether you’re serving them as appetizers, pairing with a salad, or enjoying on their own, they’re sure to be a crowd-pleaser.
Make-Ahead Options
If you want to save time or prep ahead for busy days, making your Tinis Mac and Cheese in advance is a great idea. Here are a few ways to do it:
Assemble and Refrigerate
You can fully assemble your mac and cheese in a muffin tin or small baking dish and then store it in the fridge. Cover it tightly with plastic wrap or foil and refrigerate for up to 24 hours. When you’re ready, just bake it as directed—there’s no need to wait for the mac and cheese to come to room temperature.
Freeze for Later
If you want to prepare even further in advance, you can freeze the assembled Tinis Mac and Cheese. Once they’re assembled, place them in an airtight container or freezer-safe bag. They’ll stay good for up to 3 months. To cook from frozen, bake them at 350°F (175°C) for about 30-40 minutes, or until they’re heated through.
Reheat Leftovers
If you have leftovers, you can easily reheat them in the microwave or oven. For the best texture, place them in the oven at 350°F (175°C) for about 10-15 minutes to crisp up the top again.
Quick Tip: Plan Ahead!
By making your Tinis Mac and Cheese ahead of time, you can enjoy a delicious meal or snack without the rush. Whether you refrigerate, freeze, or simply reheat, your mac and cheese will taste just as amazing.
Reheating Tinis Mac and Cheese
If you have leftovers or made your Tinis Mac and Cheese ahead of time, reheating them properly ensures they stay delicious. Here are the best ways to warm them up:
In the Oven (For Crispy Top)
Reheating in the oven gives you that crispy, golden finish. Here’s how to do it:
- Preheat your oven to 350°F (175°C).
- Place your mac and cheese in a baking dish or muffin tin.
- Cover it loosely with foil to prevent it from drying out.
- Bake for 10-15 minutes until it’s hot and the top is crispy again.
In the Microwave (Quick Option)
If you’re short on time, the microwave is your best option:
- Place your mac and cheese in a microwave-safe bowl or plate.
- Cover it with a damp paper towel to keep the moisture in.
- Heat in 30-second intervals, stirring in between, until it’s hot.
Stovetop (For Creaminess)
If you want to keep it creamy, try reheating on the stovetop:
- Place your mac and cheese in a pan.
- Add a splash of milk or cream to help bring back the creaminess.
- Heat over low to medium heat, stirring frequently, until warm.
Tip: Don’t Overheat
To keep the texture just right, avoid overheating. Overcooking can make the cheese sauce dry or grainy, so be sure to check it regularly.
Conclusion: Why You’ll Love This Tinis Mac and Cheese Recipe
If you’re looking for a fun, easy-to-make, and super satisfying dish, this Tinis Mac and Cheese recipe is your answer. It’s simple to whip up, and you can make it ahead of time or enjoy it right after it’s made. Plus, it’s incredibly versatile—you can serve it as an appetizer, a snack, or a main dish. The best part? The small portions make it perfect for snacking, sharing, or enjoying a single serving without any waste.
Feel free to get creative with your Tinis Mac and Cheese! You can add crispy bacon, throw in some extra cheese for an even richer flavor, or even swap out the macaroni for a different pasta shape. The possibilities are endless, so don’t hesitate to experiment with your favorite ingredients.
I’d love to hear how you make this recipe your own! Drop a comment below to share your variations, ask any questions, or simply let me know how your mac and cheese turned out. And if you enjoyed the recipe, don’t forget to share it with your friends or on social media. The more, the cheesier!